Get Started with Radian 1
WHAT IS INCLUDED

GETTING THE APP
CHARGING
- Turn Radian off
- Plug Radian into a USB Power Source using the USB to Micro Cable
- Radian will blink red for 30 s and then it will hold for 30s to indicate it is charging.
- How long? How do we indicate it is done?
- Battery Life LED
When you turn Radian on, the Battery LED will blink to indicate how charged Radian is.

CONNECTING
1. Turn on Radian and connect Radian to your camera with the provided camera cable. Plug it into your shutter release port. If you are not sure what cable you need take a look at our Cable Checker.
2. Connect Radian to your programming device via the programming cable provided.
3. Open the Radian app.
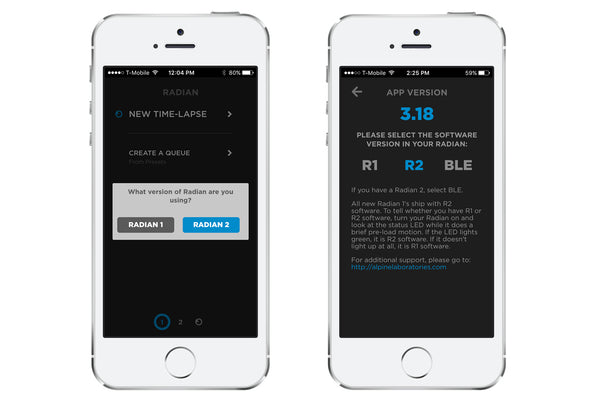
If this is the first time opening the app, it will ask you if you are using a Radian 1 or a Radian 2. Select Radian 1. If you have opened up the app previously, navigate to Settings > Version and verify that R1 or R2 is selected depending on which version of the firmware you have.
4. Upload a time-lapse using the New Time-Lapse menu or Create a Queue. You can also use Direct Drive, if you have R2, to test the moment of Radian or create a video pan. Once your Time Lapse has been uploaded you can unplug Radian, sit back, and relax!
TIPS & NOTES
Need help? Check out these Quick Fixes
Still stuck? Shoot us an email. We're here to help.